Making Armatures
One of the highlights of my experience at the UCLA Animation Workshop was the opportunity to take a master class in armature construction from Mike Johnson, co-director of "Corpse Bride" with Tim Burton. The class focused on techniques for building wire armatures and I was struck by the DIY accessibility of the approach.
While there are more sophisticated options online, like this ball and socket armature from Animation Supplies, the ability to create customizable armatures is expansive.
My armatures are crude to the likes used by major studios like Laika, but they are surprisingly versatile and easy to manufacture. This is an advantage to the modular approach, however, it also mitigates the primary drawback to wire armature — breakage.
There are many ways to make this workflow your own, but hopefully this will serve as a place to get started. This isn't a tutorial, per-se — but the steps are somewhat intuitive, and hopefully the pictures in the gallery below will help illustrate my process. I've itemized the materials and provided links to the online store of my local hobby shop, Kit Kraft. And — DISCLAIMER — some of the items used are dangerous to inhale and there are many hazards for cuts or potential injury. Please use caution and/or under careful supervision.

Do-it-yourself
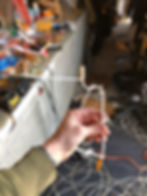
I know it looks like a mess — this process is messy — but order will emerge. But first...
PLAN and DRAW YOUR CHARACTER! You don't need too much detail, but drafting it to actual scale is important so you can anticipate particular character traits... an excessively large head, for example, may require thicker wire for structural support.
From your design, TEMPLATE YOUR ARMATURE using BEADING WIRE, which is both malleable and reusable for other applications. The beading wire will serve to measure sections of larger gauged wire. When considering gauge, think in terms of strength and dexterity. Fingers, for example, use the lightest gauge (.047 thickness), which feed into a separate wire group for hands and feet (1/16th thickness), then limbs (3/32nd thickness), and then to the root torso (1/8th thickness).
These wire groups will be bound together with strands of the same gauge. Arms, for example, will be made of three to four strands of the 3/32 gauge wire. Using more strands will help prevent, or at least delay, wire failure.
From This...

...to this

MATERIALS & TOOLS
Here is a list of links to my local hobby shop, Kit Kraft, which may be helpful for items you'll need for your build. However, most or all of these items can be procured from your local stores as well.
2109 Ventura Pl, Studio City, CA 91604
WIRE
Beading Wire, 30' (for templating and binding)
$10
.047 Wire, 50' (fingers, small components)
$5.50
1/16th Wire, 32' (hands and feet)
$6
3/32 Wire, 25' (limbs)
$7
1/8” Wire, 20' (torso, mid-size pieces)
$8
3/16” Wire, 25' (for heavy, or larger models)
$21
$2.50
$4
BRASS TUBE (rectangular)
5/32 Brass tube, rectangular (4mm)
$2.50
3/16 Brass tube, rectangular (4.8mm)
$2.50
GLUES AND ADHESIVES
Steel Stick (From JB Weld online directly)
$8
Epoxy, Devon 5 Minute Epoxy, 1oz
$6
$5
$5
Super Glue, Gorilla (from Home Depot)
$6
Mixing Stick for stirring and applying epoxy
$11
Gaffers Tape, or heavy duty cloth tape
$18
WOODEN MOUNTING PIECES
$1
$1
$.50
$10 / 10 pack
$2
MISC TOOLS
Hacksaw (find locally)
Drill (find locally)
Clamp (find locally)
Disposable Gloves (from Home Depot)
$6
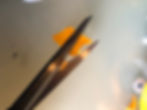
Round Nose Pliers w/ wire cutter (find locally)
Tin Foil (find locally)
Sponges, three pack (from Home Depot)
$5
Athletic Pre Wrap (from Amazon)
*Ideally would just by in black, but can find at local store as well.
$15
CLAY (optional)
$16
Monster Makers Clay, medium (my favorite)
$30 for 5lbs
$17 1/2lbs
CLAY SCULPTING TOOLS
Sculpting Toolset, starter kit
$25
$8
Zip ties work tremendously well for quickly arranging and binding the wire. Heavy-duty nylon thread also helps prevent section between the zip ties from bowing out when under stress. I initially thought twisting the wires would improve strength, not fully understanding that this actually stresses the wire, thus damaging it.
Now that the wires are arranged, they will become modular by capping the ends with BRASS TUBES. Like the wire, the brass tubes come in multiple gauges. (They also come in varying shapes, but rectangular work best). Despite the variety, it's only necessary that the two gauges are one degree apart. I'm trying to avoid over-complication, so in my example I used 5/32 for the small size, and 3/16 for the large. These sizes worked well for fitting a few strands of wire, but larger gauges of wire could require larger sizes for the brass tubes. It's helpful to think in terms of male and female components, and that sizes must be close to dovetail properly.
In my example, I CLAMP the brass tubes to a table and cut them into one inch sections using a HACKSAW. Be careful not to bend the tubes. The pieces will need filing with a METAL FILE, this pretty critical to keeping the ends flush. (Note: I also happen to have a hand grinder, so I use it. It is useful, but causes its own problems with heat and such, so use what you have and are comfortable and confident using. ms.
Perhaps the most challenging part of the process is MASKING the brass tubes and binding them to the wire bundles using EPOXY, which is basically just a glue that comes in binary parts, a RESIN and curing agent, or HARDENER. The chemicals can be harsh, so apply while wearing a protective mask and/or in a ventilated area. I also like to work on cardboard as a cheap disposable surface. Be mindful that the epoxy and other glues WILL DAMAGE SURFACES.
With the the wire bundles fused with the brass ends, the interchangeable components can be made in a number of varying pieces. In my example, I found these wooden blocks with pre-made holes in the hobby shop. My hopes that they might perfectly fit the brass tubes didn't pan out, however, it was easy enough to expand the holes with a drill. So, really these parts can be made from anything, their purpose is just housing for the brass tubes, and scaffolding for building out the character.
Although not entirely necessary and where this process devolves into innumerable possible variations, I made additional component pieces. for the head, torso, and pelvis. These sections can work with just wire alone, but interchangeability is helpful, and this worked pretty well.
By cutting the smaller brass tube into two inch sections, I was able to glue them into wooden pieces as well, making a separate kind of configureable piece (best to see pictures of the head in the photo gallery).
Perhaps more universal is how I was able to configure interchangable pelvic and/or toro components. Similar tot head, there are numerous ways to configure these pieces, but the common need is strength. Another compound sillier to epoxy, SteelStick by J.B. Weld, works remarkably well for this task. It's strong enough to drill into, but it is kind of intense to work with, so wear gloves and don't inhale the fumes.
The pelvis and torso are connected in the same method as the limbs. It may be difficult to fully determine the necessary length prior to having made the pelvis and torso. Your armature may not need both a pelvis AND torso, and it's a good example of the latitude in making pieces in this way.
That's fundamentally the end of the armature build. The fundamentals are simple and the creative applications are pretty endless. Building out the character expands on this further still, and while my example uses clay, you could easily use foam and fabric.
In my example, cheap sponges from the hardware store were perfect for bulking out my armature. They're easy to cut, they're lightweight, and are cheaply purchased in bulk. Prewrap athletic tape found at the local pharmacy was also help to shape the sponge and not add any weight, which is really the key. Tin foil is helpful in this way, as is cloth tape to hold everything together. All of these have similar surface that allows for the clay to bite and spread evenly.
While Plastalina is really the medium for stop motion, I love working with Monster Makers' clay. It's kind of expensive and really more of a material for static sculptures, but worth trying out. Alternatively to Monster Makers, Magic Sculpt is a highly applicable material for crafting things like heads and hands. You don't need much to turn your fun with armatures into fun with clay sculpting, and here are some tools to get started... SCULPTING TOOLSET and DOUBLE WIRE END TOOL.